I do not sell these or make any stilts for sale!
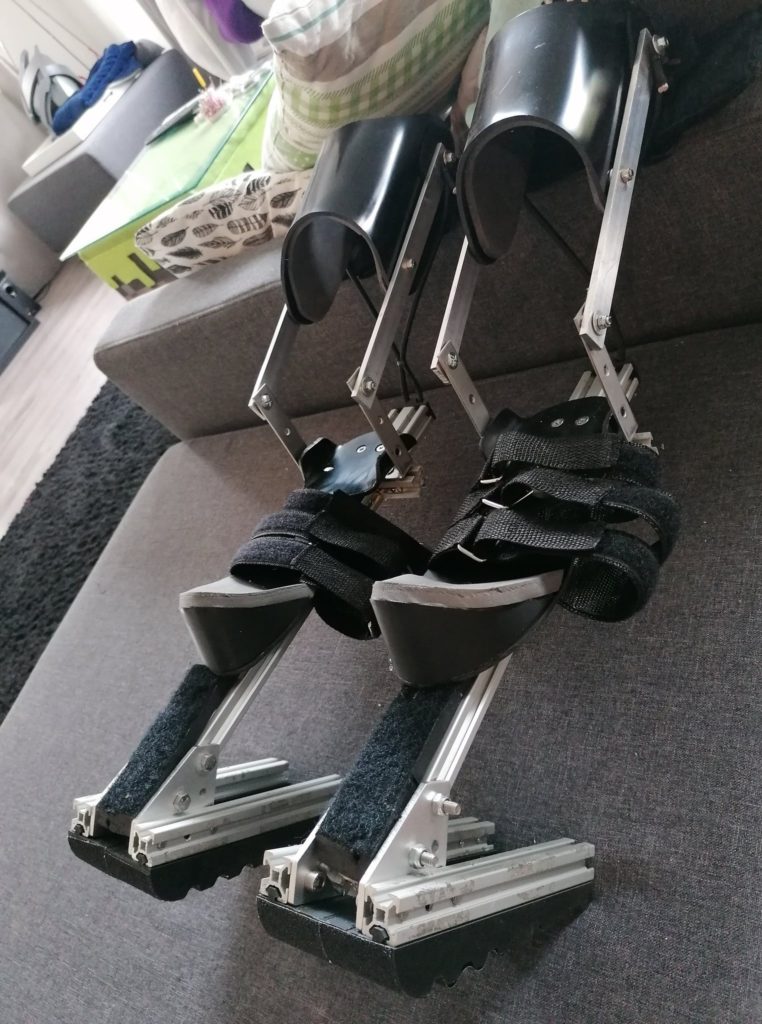
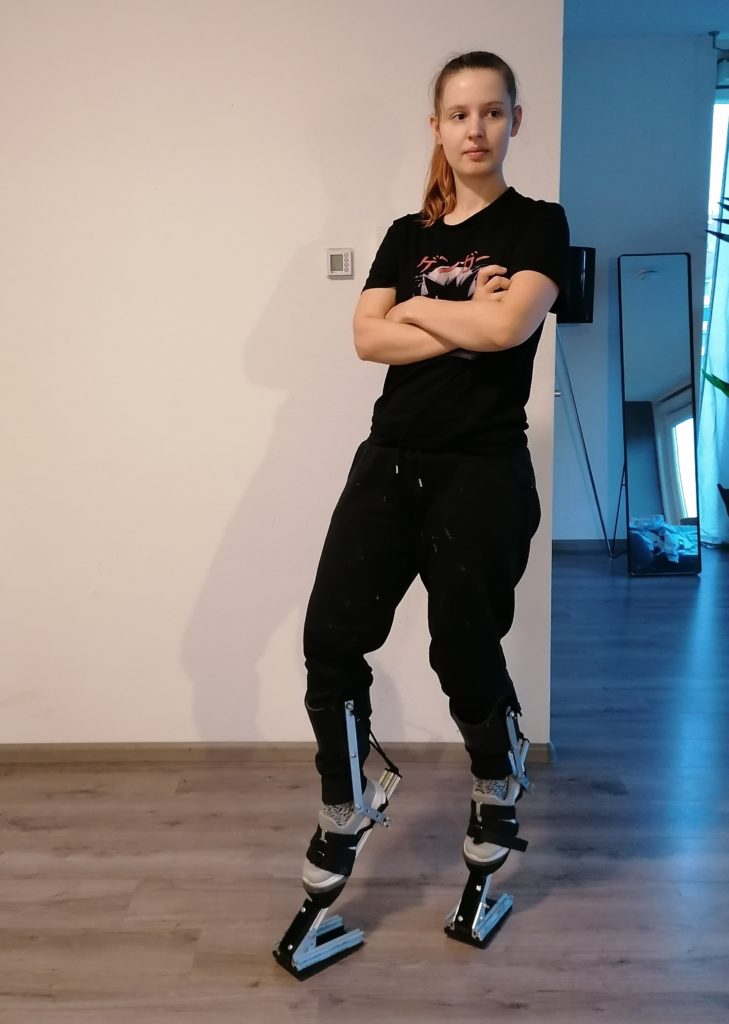
This describes my build of digitigrade (digi legs) stilts.
I’ve used this same stilts set in various costumes: Demon hunter/Illidan, Kerapac, my werewolf.
They’ve gotten a couple QoL updates based on my first experiences, they’re either noted throughout the document, and again described at the end. Read through the entire thing if you want to do your own, because some are quite necessary.
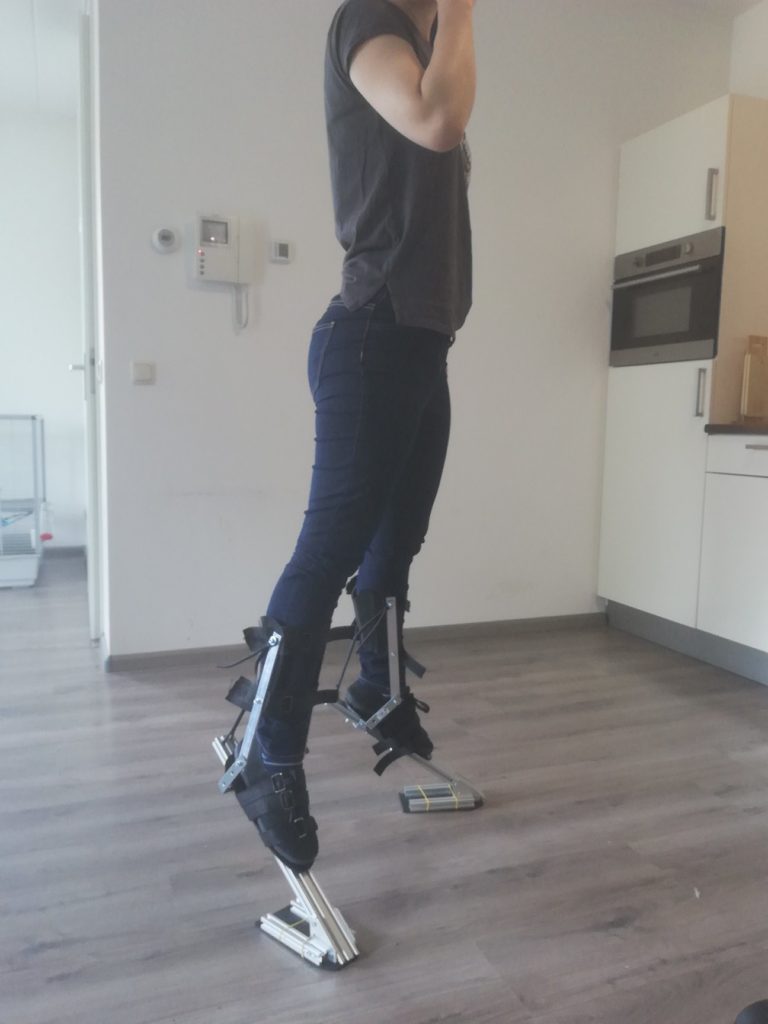
These stilts are mostly for posing/standing still, unlike full leg stilts with thigh support from weta/digilegs. It works better for bigger costumes made for photography and unassisted wearing for a longer time. So the weight balance, stamina and stability are the focus, not running/movement. Center of gravity is supported both when crouching (front ground contact of the stilts) and relaxed upwards stance (back ground-contact point of the stilts).
For these stilts I used the following tools:
Power drill
Tap and die se
Electric jig saw
Metal handsaw
I used the following hardware:
2x Aluminum 2040 extrusion 450mm
4x Aluminum 2020 extrusion 180mm
4x Aluminum joining plate 90 degrees
4x 250mm Aluminum slats 20x5mm (get 300 to 350mm if youre taller)
4x 100mm corner brace (stainless steel!)
4mm ABS plastic sheet
I used the following bolts and bits:
~40x 25mm M5 bolt
~20x M5 locknuts
~40x M5 washers
8x 60mm M6 bolts (stainless steel!)
thick bungee cord (now 1/16th to 1/8th steel wire rope)S
Some T-nuts and bolts for aluminum extrusion
For the straps I made my own using:
25mm wide nylon webbing
50mm wide nylon webbing
20mm wide velcro
50mm wide velcro
6x rectangle D rings for 25mm
2x rectangle D rings for 50mm
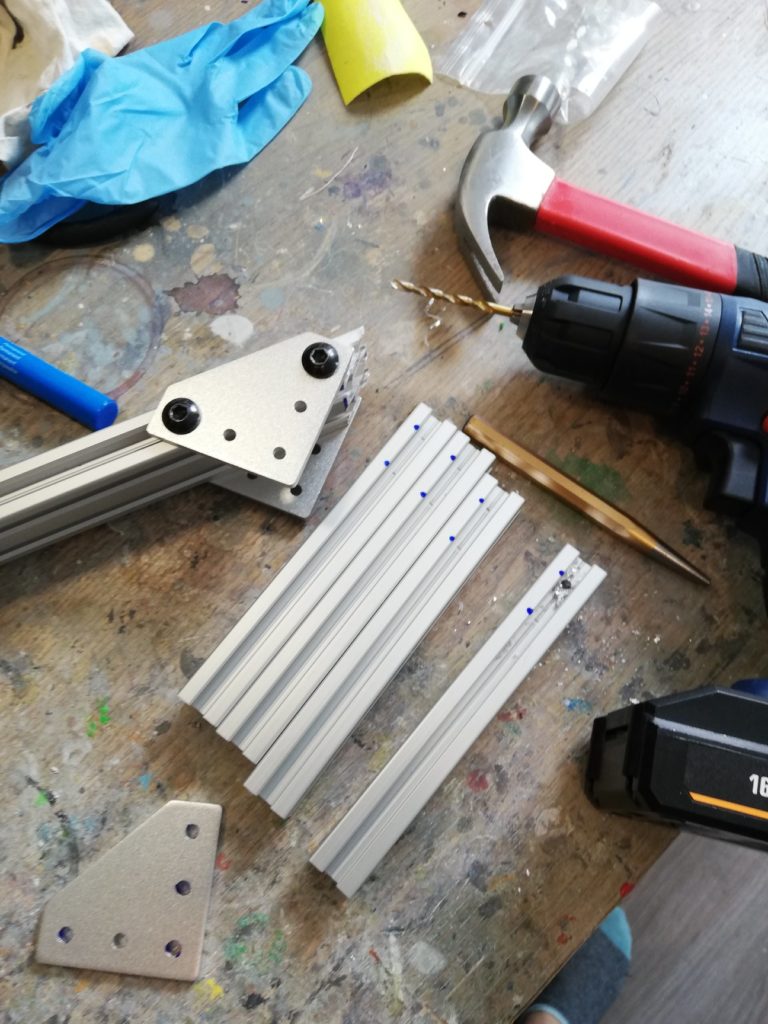
I started on the base. I didn’t get the 2040 profiles cut to size, so in the picture I sawed 2x 450mm 2040 profiles from one piece of 900mm with one side 45 degree corner. My latest version of the stilts has a straight cut(!)
I got the 2020 profiles cut to size (180mm) from the same store (aluxprofiel.nl).
Using the holes in the 90^ joint plate I marked where i need to drill the aluminum profiles. Use a centerpoint I hammered a hole in the profiles and then I drilled them with my power drill in size M5.
Then I tapped the holes using an M6 tap and die set which leaves the holes threaded and then I could use my M6 stainless steel bolts to bolt everything together.
Note: I later mounted these 2040 profiles with a straight cut, under a steeper angle of ~55-60 degrees instead of the 45 degrees imposed by the joining plate. I drilled an extra hole in the joint plate to accommodate.
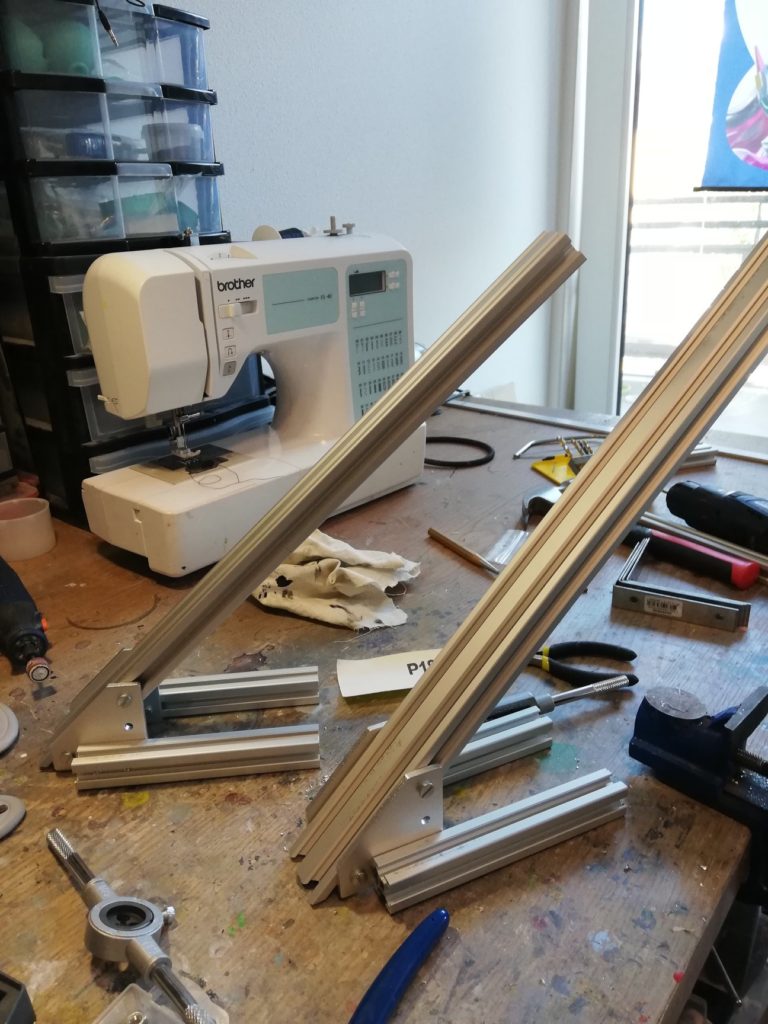
I mounted the smaller 2020 side profiles on the outside which makes the point of contact with the ground much wider and more stable. They were also drilled and then tapped.
Once the base was put together I figured out the joints for the shin support.
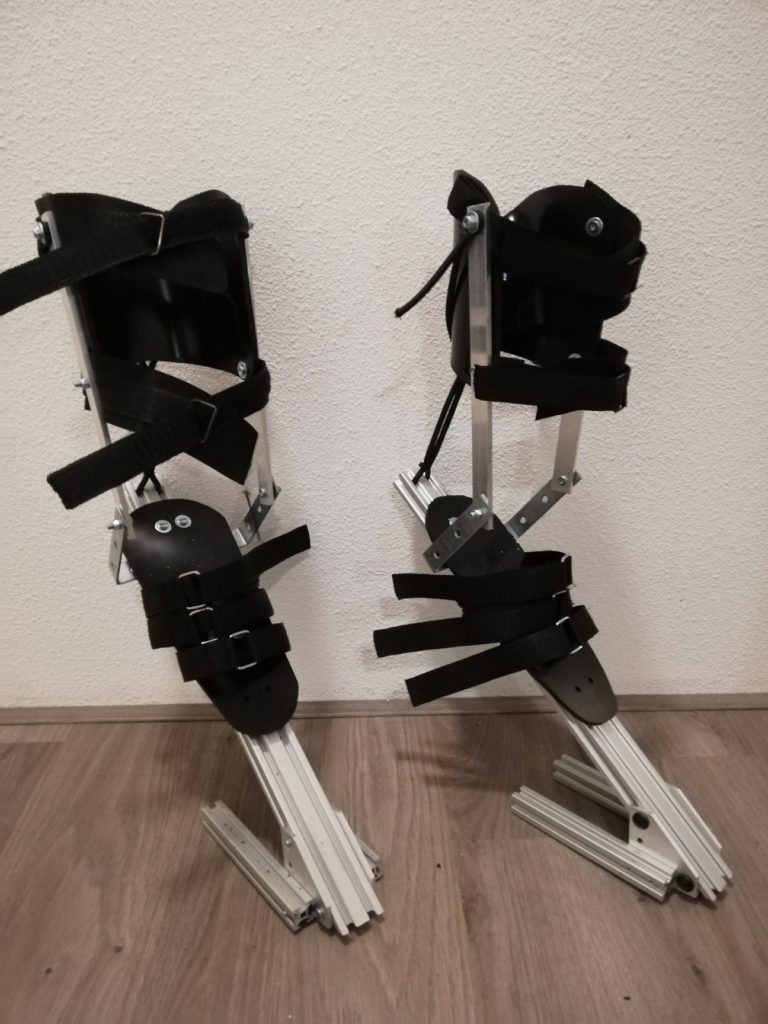
Stainless steel corners were mounted on top of the 2040 profiles near my ankles, by drilling and tapping two holes through the profile and the corners to match up the width of my ankle.
The photo shows the old setup, where I bent galvanized corners around the profile and then bolted them down, but these will warp.
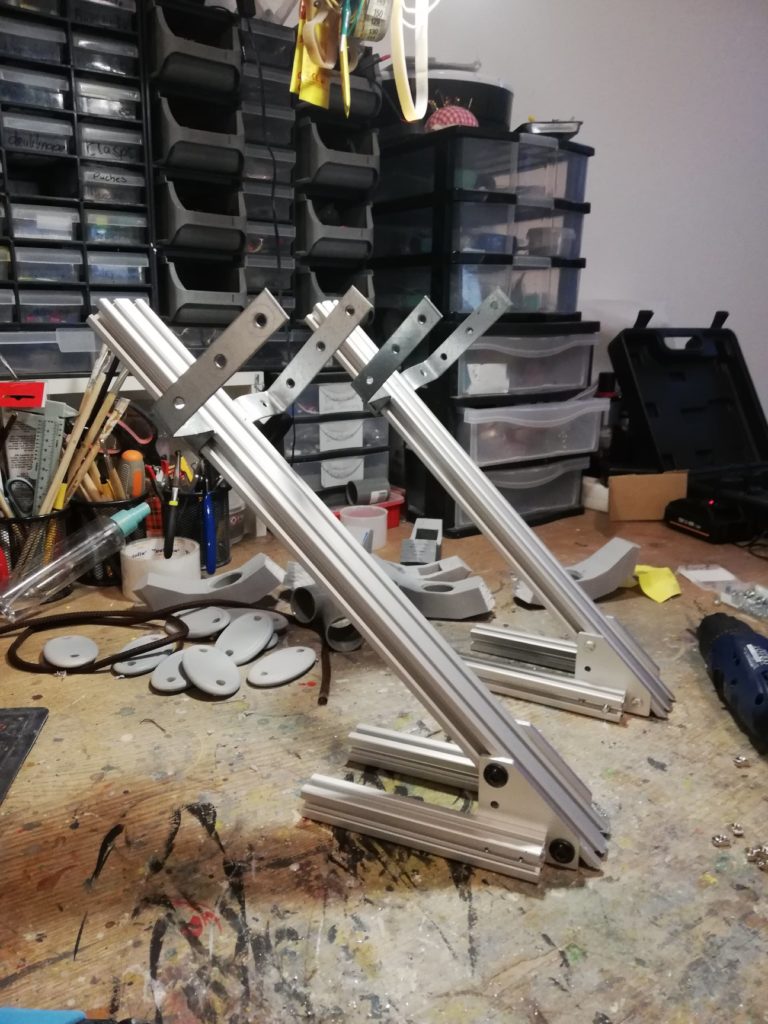
I added 250mm long 20x5mm thick aluminum slats. I had to cut these to size by hand and I bought 1 meter to make 4.
Note: I would have picked a little longer (~300mm) to provide more support further up the leg, especially if you’re a taller person.
I drilled both ends using M5 drill and mounted them to my steel corners with my M5 bolts and locknuts to prevent the nuts from falling off. Some washers were placed in-between so it rotates easily.
I drilled two holes for my bungee cord on the core 2040 profiles, and looped the bungee cord through the end, ziptied it in the middle. The ends of the bungee cord were then looped around the bolt to the top of the aluminum slats, tightening the loop again with a ziptie.
Note: The bungee cord was replaced with steel cable and wire clamps to fasten it.
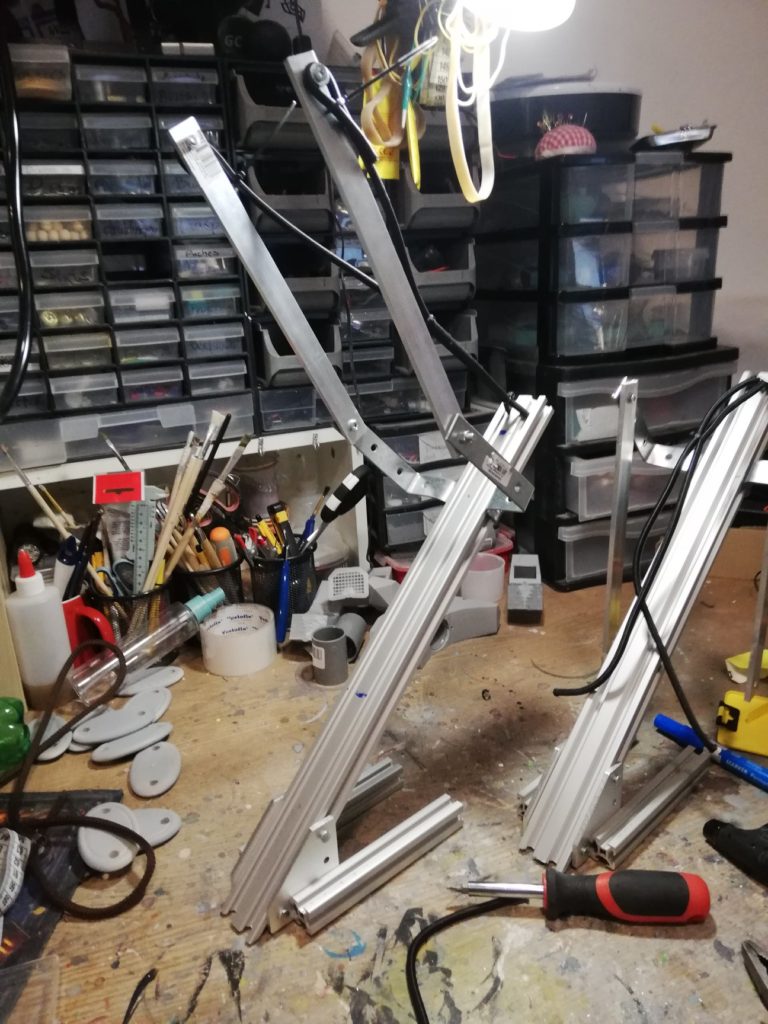
That’s pretty much the base frame complete.
I used an electric jigsaw to saw some foot plates from 4mm abs plastic sheet.
I drilled 4 holes through the foot rest plates, and through the frame using an M6 drill, and used very long countersunk bolts to bolt the foot plate and the straps to the frame all at the same time, with locknuts at the bottom. I used some wide washers so the nylon straps would not pull off the bolts.
I used a countersunk drill and some spare pieces of abs plastic to thicken the foot plate to make sure the bolt heads would not protrude through my shoes.
Note: I added 3D printed and foam toe rests, simply superglued to the footplate of ABS plastic.
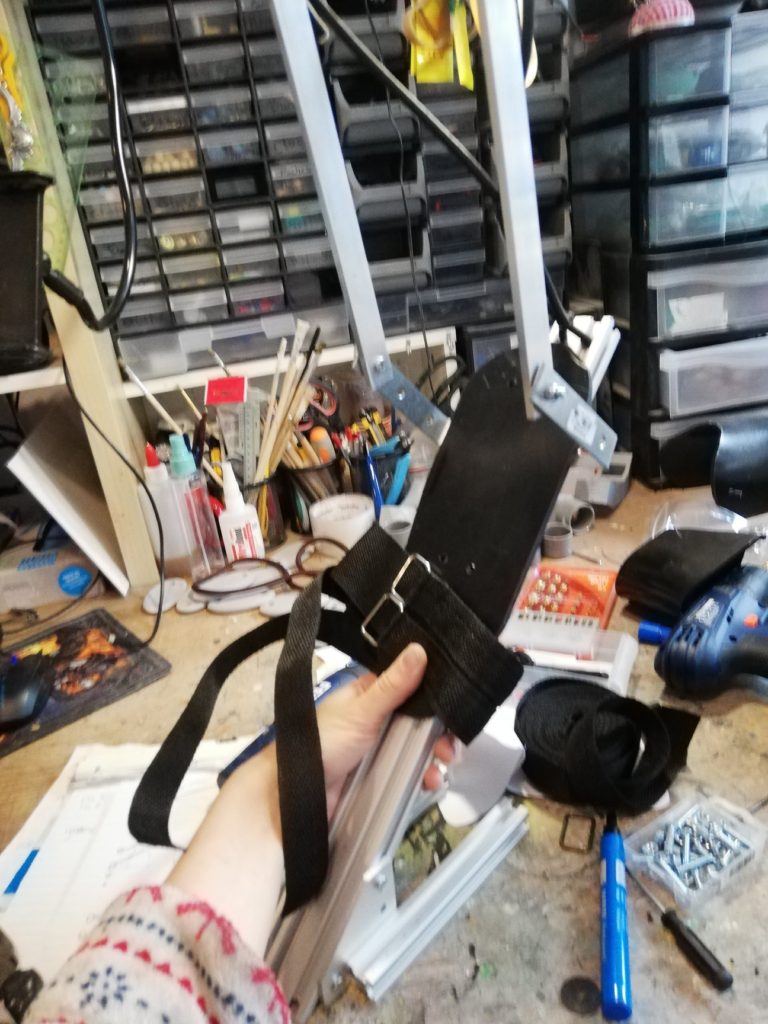
To create the shin support I sawed out 2 more ABS plastic sheet shapes to support my shin on one side, and then straps on the calf side. The pieces were heated to a C shape with a heatgun. And then bolted into place to the aluminum slats.
Last I added the straps and plates for my legs to sit in. I sewed my own straps from some nylon webbing, velcro and D rings I had left over. I doubled up the nylon straps for comfort and strength. I added one wide strap over the roof of my foot ( as far up as possible) and one wide strap across the calves. I added one thinner strap across the toes. They were fastened in-between the bolts used to mount the foot plates and the chin plates. Some washers were placed in-between to prevent fraying to the point they could fall off, and the holes in the nylon straps were burned with a lighter to prevent fraying as well.
I then tightened the bungee cord (now steel cable) ends at the top bolt for the chin support, in-between some washers.
Note: The ABS plates for my calves were later inverted to be placed on my shins instead (the picture shows it on the calves). A layer of 5mm eva foam was added to the abs plates for comfort. The straps are now closed from the back.
Feedback adjustments that were made after initial tests and extensive use:
I noticed some bolts and other galvanized steel pieces may wear out quickly or even bend due to the forces and changed all of those bolts and parts to stainless steel.
I 3D printed toe rests (basically a 45 degree angle block that fits the foot rest) for comfort. Added some eva foam on top of that as well. You can use wood, plastic, foam (XPS, yoga blocks) etc too.
I also bolted high density eva foam pieces to the bottom of the stilts using sliding T-nuts, this makes it softer, less noisy and easier to walk (and doesnt damage floors).
I 3D printed a loop for the steel cable to go through.
Some velcro was added to the front and back to easily attach skins for costumes. It can be glued or T-nuts to attach.
I swapped the elastic bungee cords for steel cable, with a wire clamp that can adjust the angle of the stilts if necessary.
These additions are not necessary but may improve comfortability/modularity, you may be able to find some suitable alternatives with other material/repurposed items.
Updated photo of stilts below: The angle is steeper, a toe rest was added, the lower leg support is at the chin, velcro to add costume skins, and while the photo shows a 3dprint, it is now high density eva foam as contact with the floor.