Here I describe my steps that I undertook to reduce the noise of my Peopoly Phenom resin 3D printer.
The Peopoly Phenom resin 3D printer is a great value large format MSLA printer for large scale resin prints, up to 40 centimeters tall.
Peopoly sponsored this printer for me, but I live in an apartment and this printer is really only suitable for industrial environment/small workshop.
Two things that were the loudest: The Z-motor (when homing or moving large distances), and some of the fans.
To prepare and orientate: I put the Phenom on a low table with the door facing down and the bottom of the printer facing myself, with a soft carpet under the printer.
Parts
TMC2130 SilentStepStick motor driver (v1.1) (tinytronics.nl)
PWM control board, 5-35V, 5A (tinytronics.nl)
Noctua 12025 24v 2000rpm (industrial, from amazon.de)
2x Sunon 12025 24v 34dB 74CFM (reichelt.de)
The Z-motor:
To quiet down the Z-motor to almost zero, I installed a TMC2130 SilentStepStick stepper driver (v1.1). This driver is specifically developed for 3D printers and also includes some additional fuctions, such as sensorless homing.
I did not make use of these functions (included in the SPI mode) but I set the driver to Standalone Mode by soldering two connections on the board together (see below).
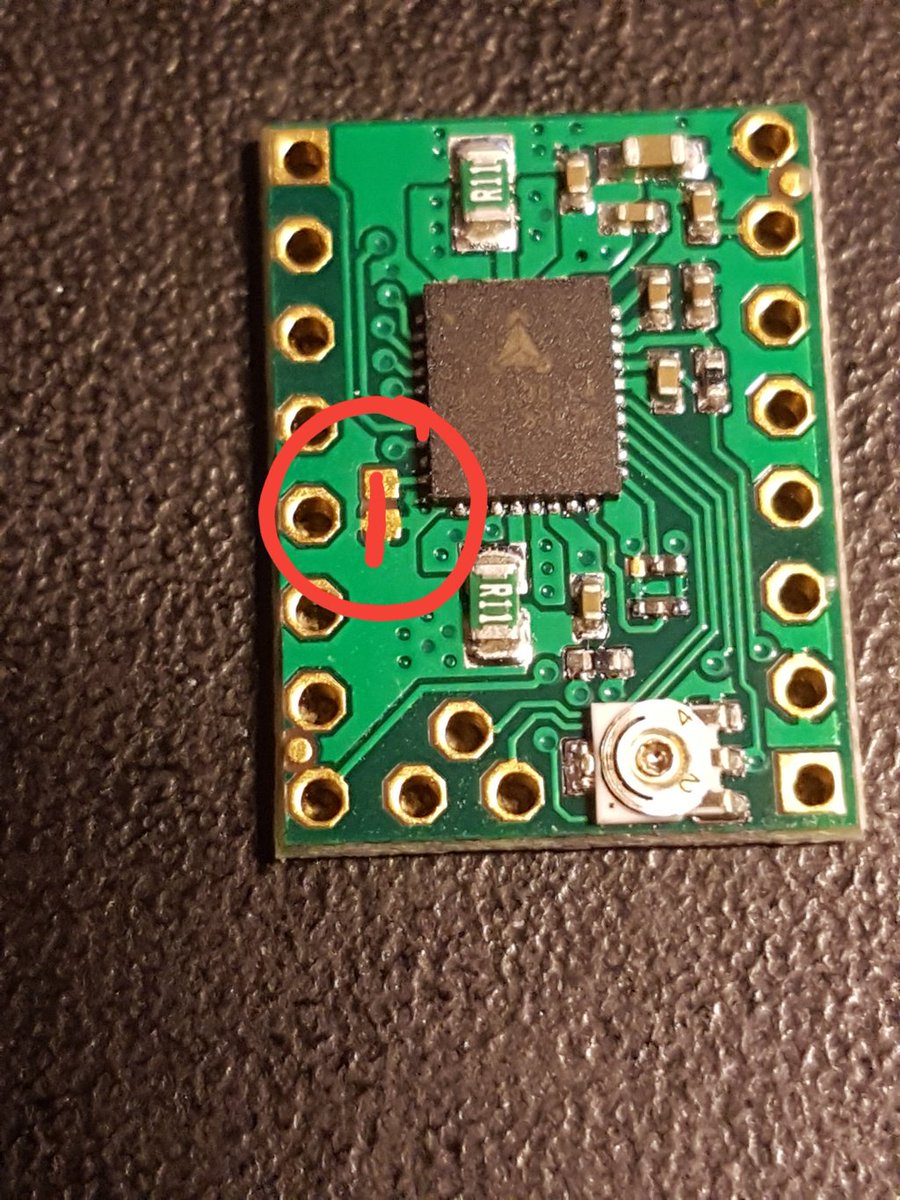
Standalone Mode TMC2130 only needs to be installed directly between the stepper motor (MOT) and the main board (MUC) without additional settings or instructions.
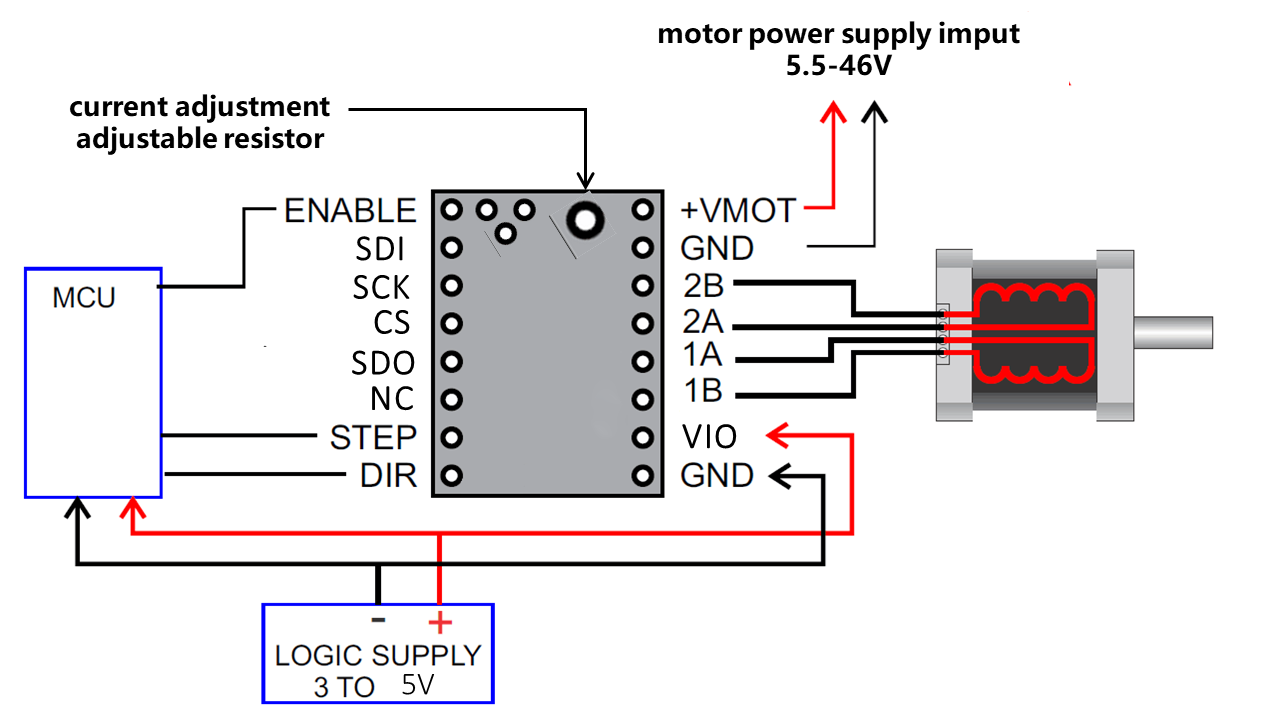
The board includes various extra pins that need to be connected to the power supply (Vmot) of 24V+ and GND, to the logic power supply (5V+ and GND), and to connect the EN (enable), STEP (stepper motor) and DIR (direction of the stepper motor), in addition to plugging in the z-stepper motor plug itself (at 2B, 2A, 1A and 1B). I did that with various jumper wires.
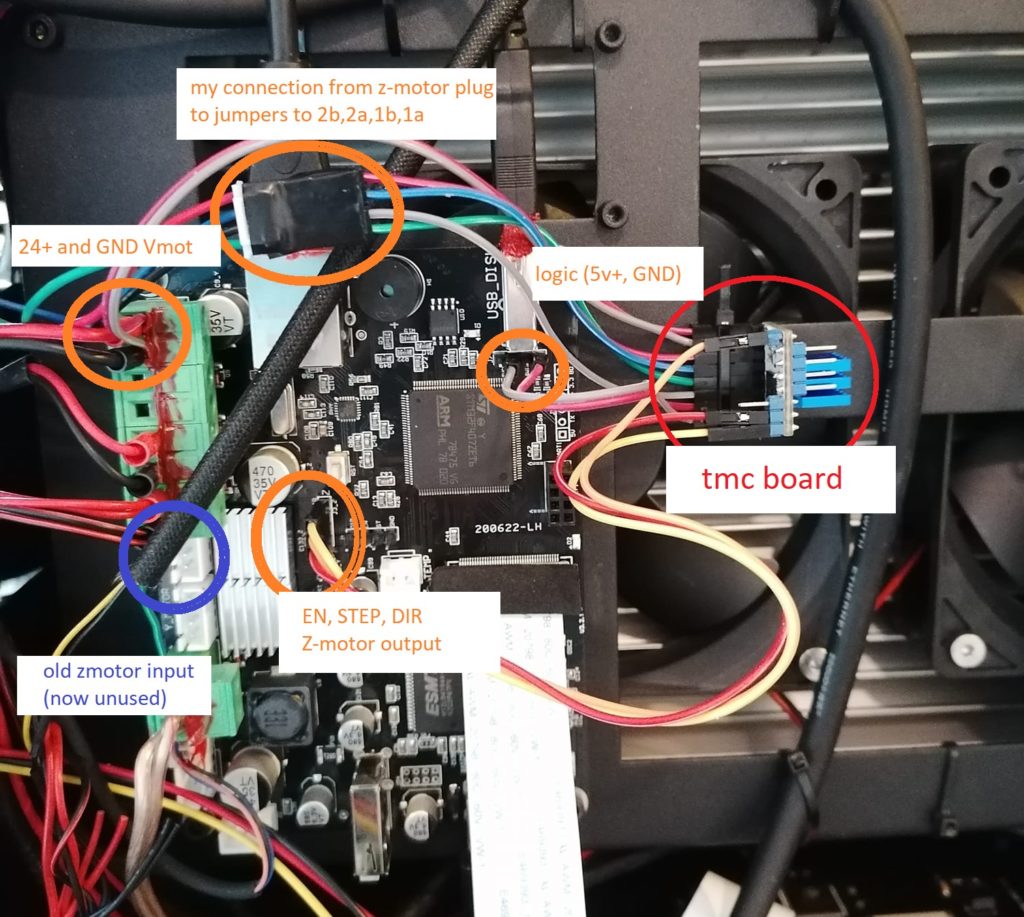
You can find the power supply (V-mot and GND) to the top left of the board (green screws) and clamp crimped wires inbetween the connections.
You can find the logic power supply (5V+ and GND) at 3 pins near the usb plug, I just stuck some jumpers on those. Fastened with a bit of hotglue.
The z-stepper data pins (EN, STEP and DIR) are found on the other side of the heatsink next to the normal z-stepper plug-in (that plug is now left empty).
The z stepper plug is then plugged into the board marked at pins (1a, 1b, 2a, 2b). The red wire is 2B, then the rest should follow suit. However I noticed the driver would make the rotation inverted (up was down, down was going upwards) and thus I swapped the first pair to invert the motor direction (so 1a plugs into 1b, and 1b plugs into 1a) by adding extra jumper wires inbetween and crossing those over (grey and green jumper wires in the photo).
The fans
The phenom has a number of fans: 3x turbo (radial) fans sized 60x60x15mm to cool the screen from below (inbetween the led array and the lcd screen). 2x case fans sized 120x120x25mm on both sides of the printer and 2x led array fans sized 120x120x25mm cooling the heatsink under the led array.
The loudest fans are the turbo radial fans, and radial fans are extremely inefficient. I disconnected these radial fans (later reconnected to a PWM control board). I got a 120x120x25mm noctua 24v 2000rpm industrial fan and mounted this to the back of the printer (on top of the removable back panel). I designed a large fan mouth with fins to direct the airflow over the lcd screen uniform (you can download this fan mouth from my downloads page on the website). It sits just over the edge of the led array, and any 12025 fan can be sat inside. Some double-sided tape was used to fasten it but it sits clamped in between the case pretty well (i had to unscrew the board frame to squeeze it in between, be very careful with the LCD screen wire!!
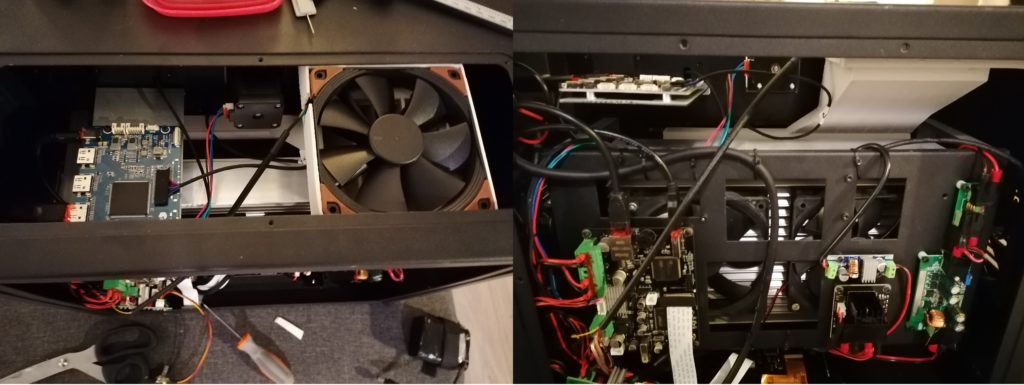
The noctua fan is a pwm fan with 4 pins, but by just using the ground and pwm pin you can power it at full speed like normal. These pins were connected to where i disconnected the radial fans.
The original turbo radial fans were then plugged into a PWM control board with turning knob that i had laying around, so I could adjust the voltage and thus adjusting the RPM/fanspeed (note that if you turn down the voltage and thus the fan speed, it does not cool optimally). This way I could adjust the fan speed during noise-sensitive times such as night.
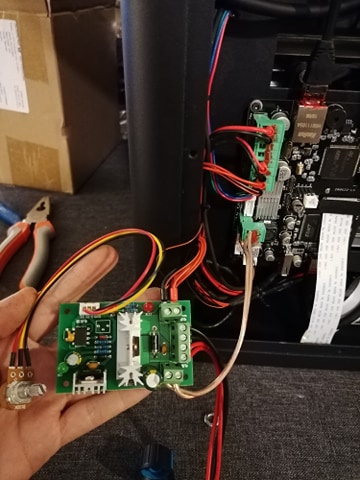
After these changes, the case fans on the sides of the printer are the noisiest. They’re pretty tricky to remove and I had to remove the fan mouth again to slide them out through the back panel.
I replaced the case fans using sunon maglev fans 12025 24v MEC0252V3-0 which are 34db and an airflow of 74CFM, from Reichelt, as theyre cheaper than the noctua industrial versions with comparable specs. The noise difference was not a lot, the case amplifies the sound a lot, so consider the lowest db fan you can find with enough airflow (minimal 60CFM).
You could also get those noctua 12025 24v 2000 industrial fans to use as case fans aswell, making total count of purchasing these fans to 3x.
I did not touch the led array fan, they’re quite loud but acceptable compared to rest of them. Theyre also 12025 so you could replace them with 5x all of the noctua fans (consider getting the 3000 rpm version for the led array fans).
