I do not sell these wings or make any wings for sale!
I do not sell these wings or make any wings for sale!
My first pair of animatronic wings was built end of 2017 and has seen some revisions since then to the structure! Ive created about 7 different pairs of wings and backpacks and each one is unique so there’s lots of ways to approach making animatronic wings.
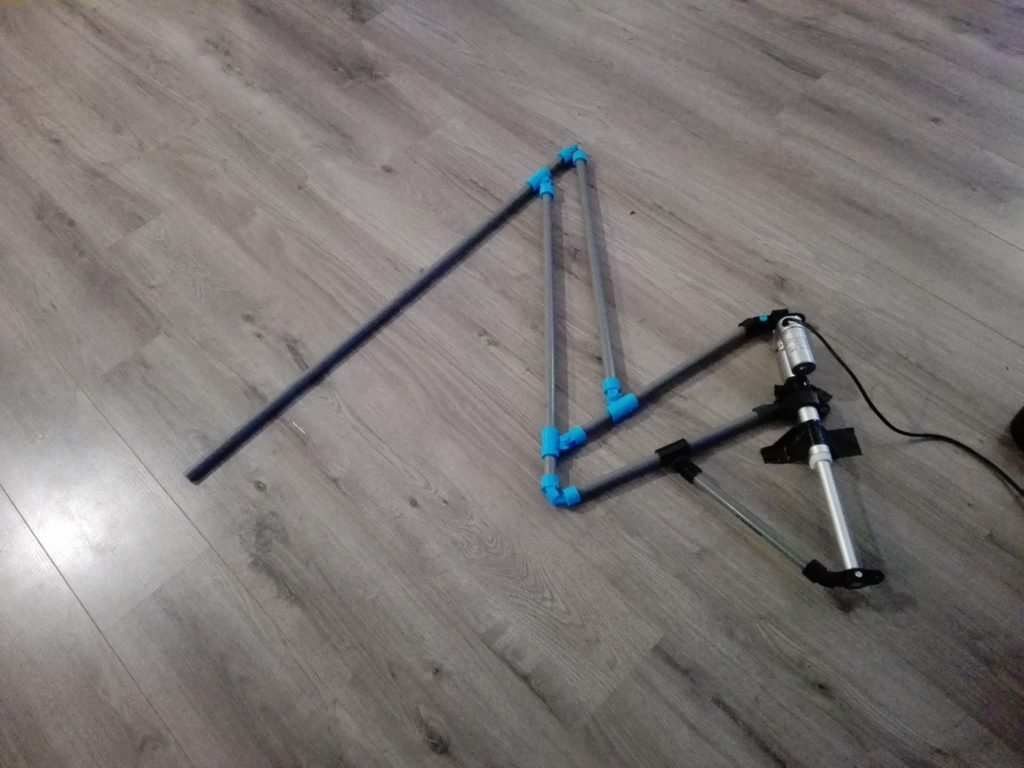
The basics: It looks like an automatic umbrella, but with only two arms to each side. The ‘umbrella’ movement going up, is moved using a linear actuator motor.
The ‘arms’ are created with pvc/aluminum pipe and 3D printed joints/hinges. My most recent pair of wings however no longer use 3dprinted hinges, I just drill holes into the pipes and bolts to rotate.
My 3d print files for this project are my own, as this is a build log and not a free how-to. It’s important to bring some own vision to undertake such a project. You can design your own, simply screw the pipes together by drilling holes and bolts (like i do now), or for example diy joints using drying racks, camping/RV tent materials etc.
Materials for the frame:
Hardware
Minimum 6 meters each of approx 1/2″ to 3/4″ pvc tube/aluminum tube (no wood)
Plenty M6 bolts in various lengths
Plenty M6 nuts
~64x M6 large washers (act as bushings)
ABS plastic sheet 3 to 4mm thick
Recommended: ~50N gas springs 2x approx 3-4 inches or strong rubber/elastic to help the movement
Electronics
12V Linear actuator 100mm stroke length (150N-200N, ~70mm/s)
Example 1: https://nl.aliexpress.com/item/32688359779.html
Example 2: https://nl.aliexpress.com/item/32939591656.html
12V DC motor/2-channel remote control set, rated minimum 5A
Example 1: https://nl.aliexpress.com/item/32996454911.html
Example 2: https://nl.aliexpress.com/item/32840414129.html
Don’t forget to buy the actual remote button
12V battery with minimum 3A discharge capacity (have a look at 18650 battery sets, RC car or CCTV batteries)
Example 1: https://nl.aliexpress.com/item/32911791019.html
Example 2: https://nl.aliexpress.com/item/32835364746.html
BUILD
The motor backpack:
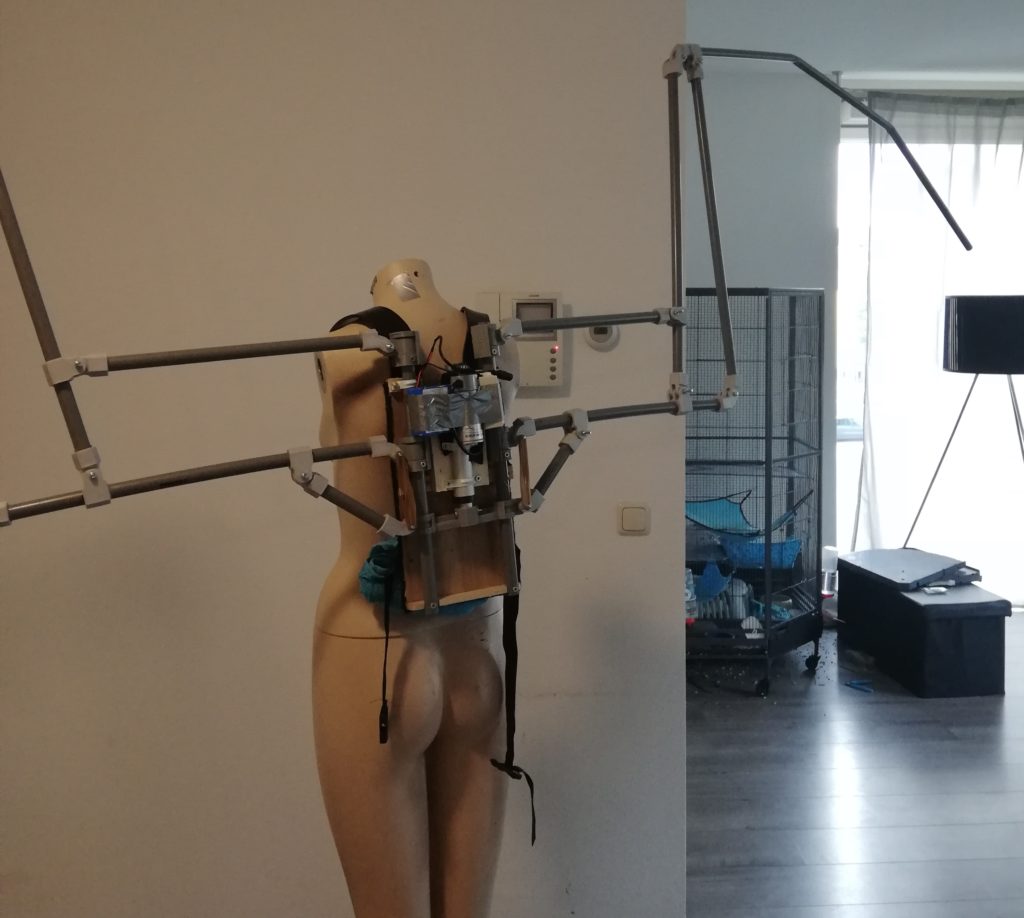
I created a 3D printed frame in which I could add the actuator, battery and remote control in the center. Three hinges on either side of the frame allows connection of the wing frame, of which the bottom hinge is moved up and down using the linear actuator (like an umbrella).
First simplified prototype of this idea (built in 2017), the arms were connected directly to the linear actuator:
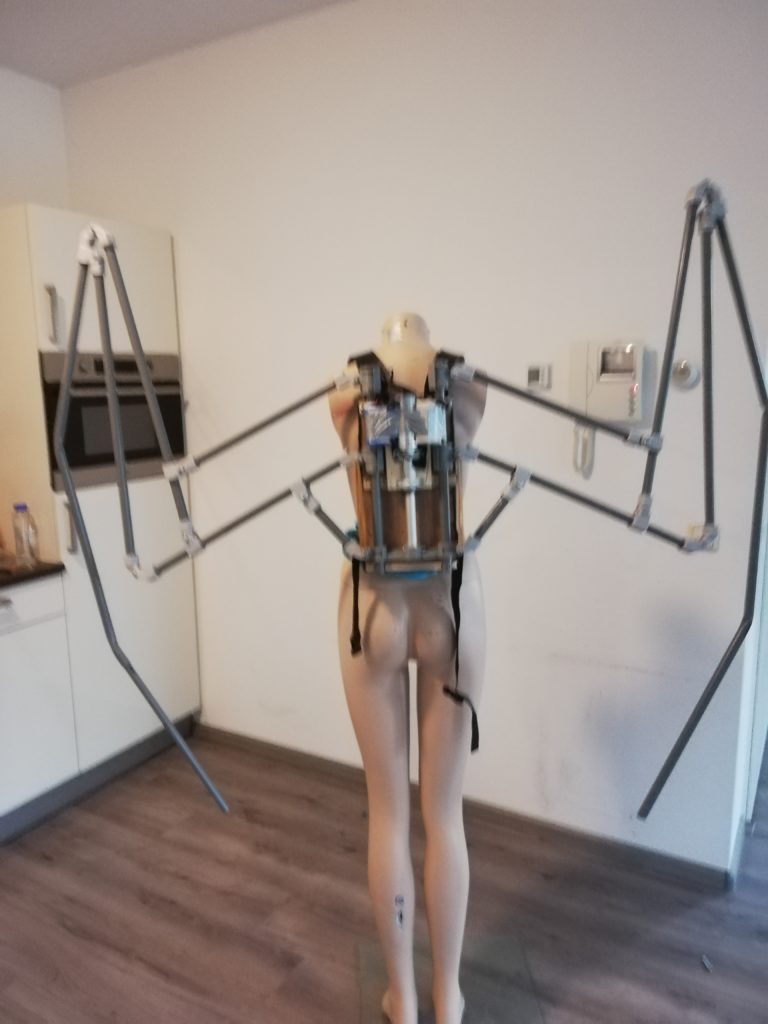
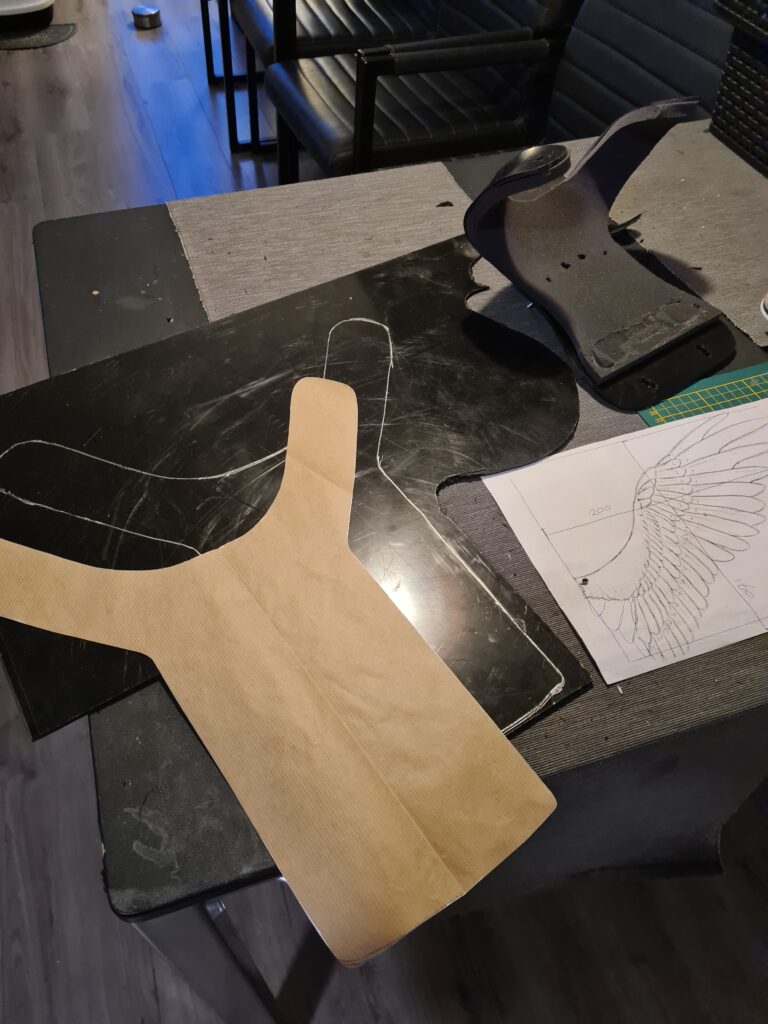
The 2022 frame looks like below. The frame pieces are 3D printed. The back plate is 4mm ABS plastic cut out and shaped with a heatgun to hook over my shoulders.
Hinges are built so the wings can swing back and forth for natural swing movement (and to move through doorways without walking crab).
Two of the same aluminum pipes, are used as hinge pins, but also double up as linear guide rods to move the motor up and down on the bottom hinges.
I used extra elastic bands on either side to help the motor against gravity when the wings are lifted, so i don’t have to compromise on the speed/power ratio and the motor doesn’t stall. You can use rubber bands, gas springs (used to lift car trunks), elastic rope etc.

How to wire the circuit:
You can also purchase a DC motor remote control set (minimum 5A power rating), it has this part pre-made for you. All you have to do is connect the battery to input, and the motor to output as instructed.
If you’re using a 2-channel remote control board, you can create a so-called H-bridge switch to invert the power polarity (and as such, retract the motor) with your remote control’s two buttons.
Below is the circuit diagram:
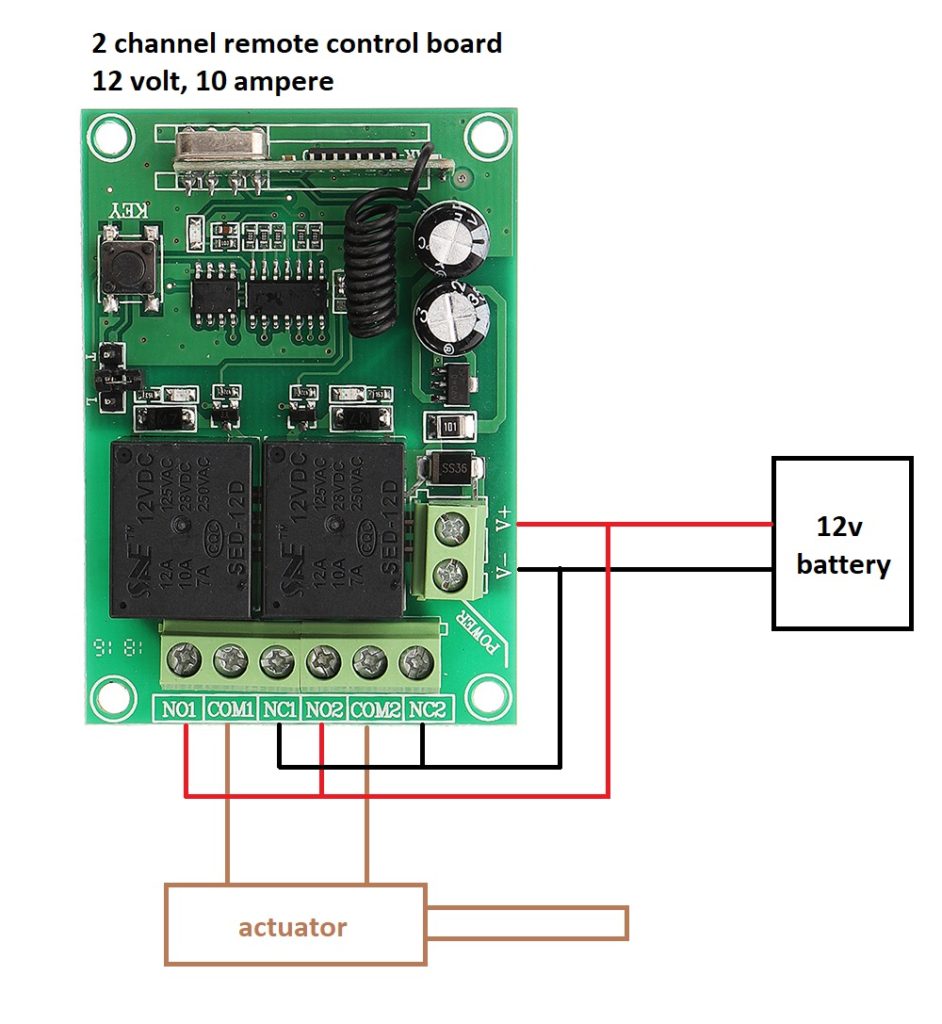
If you need a more visual approach, follow this youtube video. Instead of a DC motor in the video, you’ll be using the linear actuator.
How to create the wing frame:
When designing your frame angles and distances, try to keep the ‘elbow’ of the wingframe (the first corner of the frame), parallel or lower than the shoulder of the frame, this will help a ton in stability and balance (your point of gravity).
If you 3D print your joints, try to keep the layer direction perpendicular to the force exerted on the joints, otherwise they will snap quickly.
Experiment with this strength before final assembly.
Keep the space between your joints/moving parts as tight as possible, or your frame will start wobbling.
Compared to the mechanical sketch video below, i always have to adjust the length and ratio of the frame assembly, as it’s not a perfect translation to the real life forces, angles and real distances between the joints. Keep that in mind and don’t fixate the joints until you know 100% that you have your wing ratio AFTER installing all the feathers/skin, because of the weight they add. The dimensions in the video are in centimeters and are a good start to see if that works for you.
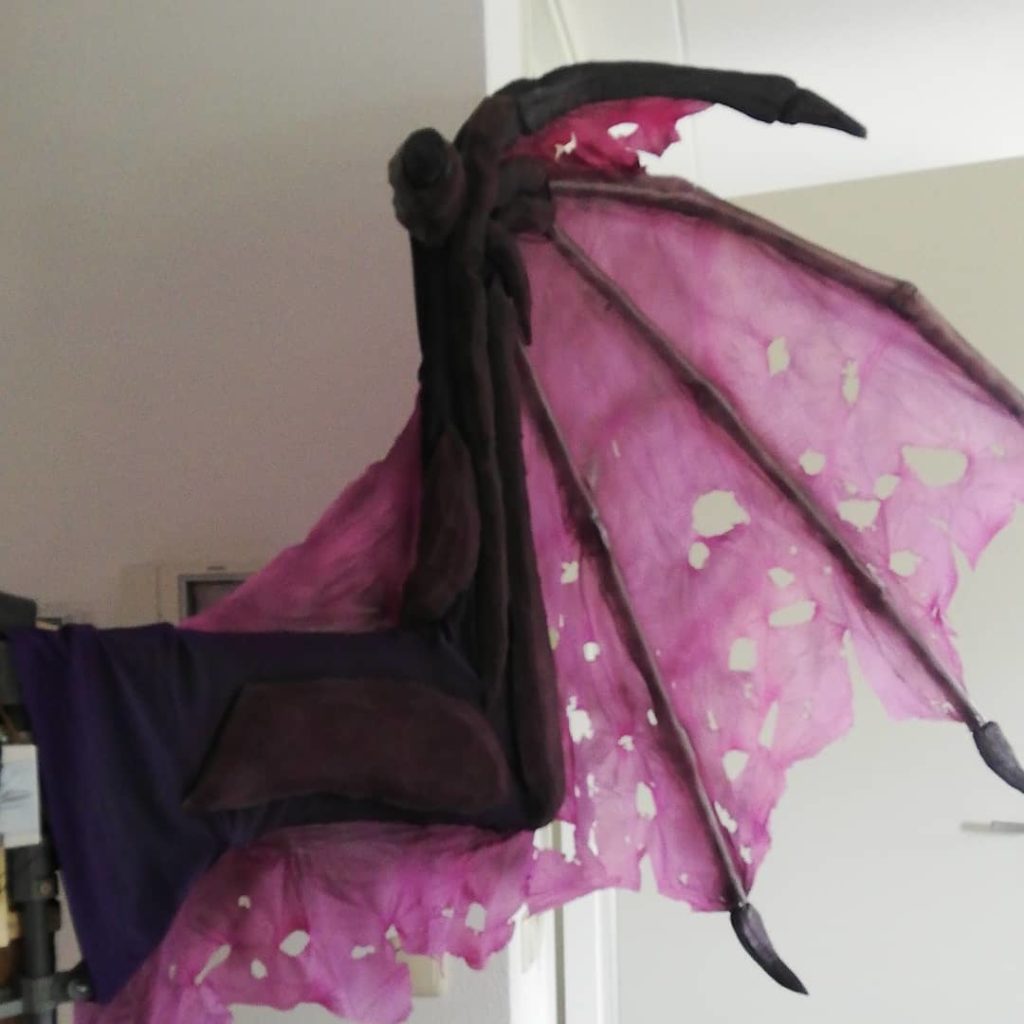
MEMBRANE (such as dragon wings/demon wings)
Materials:
6 meters chiffon fabric
3 meters jersey fabric
Upholstery foam 1 inch thick
10 meters foam piping
I sew a stretchy tricot fabric casing around the framework, before gluing upholstery foam muscles to this ‘pillow case’ and paint this as well with latex mixed with acrylic paint. The fabric casing is added while the frame is mostly extended (but not entirelly), for the best fit.
I use chiffon fabric to create the skin membrane for my wings. The chiffon fabric is glued to the frame, and you can burn holes into the fabric using a soldering iron or woodburning tool, as it is a synthetic fabric.
I use upholstery foam, insulation foam pipes or low density eva foam to create the fingers and paint that with latex mixed with acrylic paint.
FEATHERS (for angel wings/feathered wings)
Materials:
8 meters poplin cotton fabric or lining fabric
3 meters jersey fabric
10 meters iron wire ~3mm (or 12 gauge)
50 meters iron wire ~1.5mm (or 16 gauge)
150 pcs turkey feathers ~30cm
500 pcs goose feathers ~10-20cm
fake fur, feather boas or down feathers to cover the top
~500ml woodglue
These numbers are all approximate, maybe you need less.
The fabric I use to create large fake feathers is usually poplin cotton or broadcloth, this is very lightweight and easy to glue and paint, but may fray and look matte. Acetate fabric is also nice, this fabric is commonly used for lining and gives a nice realistic shine also present in the real wings.
One pair of wings with atleast 4 meters wingspan requires 8 meters of fabric and more than 50 meters of iron wire.
For each feather I cut strips of fabric approx the same length. Dont bother to cut the fabric to feather shape beforehand, gluing it together accurately is not worth the time.
I use woodglue thinned with water to glue feathers from two layers of fabric with a piece of iron wire in between.
The iron wire I use usually varies between 1.5mm and 3mm in thickness (3mm for the largest flight feathers, thin fiberglass rods are also an idea).
Wet glued strips are left to dry on a clothing drying rack, ironed and cut to shape afterwards.
Many holes evenly drilled into the frame is used to hook all the iron wires from the feathers into the frame.
Strong thread (upholstery thread, fishing wire) is used to tie the feathers together so they lift up once the frame extends, like roller blind curtains.
I use stretchy jersey fabric to create a blanket over the jointed parts of the frame, and sew or hotglue the real (smaller) feathers to this blanket before using magnets/thread etc to fasten it to the frame.
Research the shape and layout of real eagle/swan wings etc to make sure you arrange and place them neatly, and dont forget to use the top side/bottom side of real wings in the same direction as your wings. You can iron real feathers with a hot steam iron to flatten them to fit your frame better as real feathers have quite a bit of curve.
The process is nearly the same as that from Alexis Lincicome/The Griffin Queen so you can see her youtube videos on how to make and add all feathers in more detail.
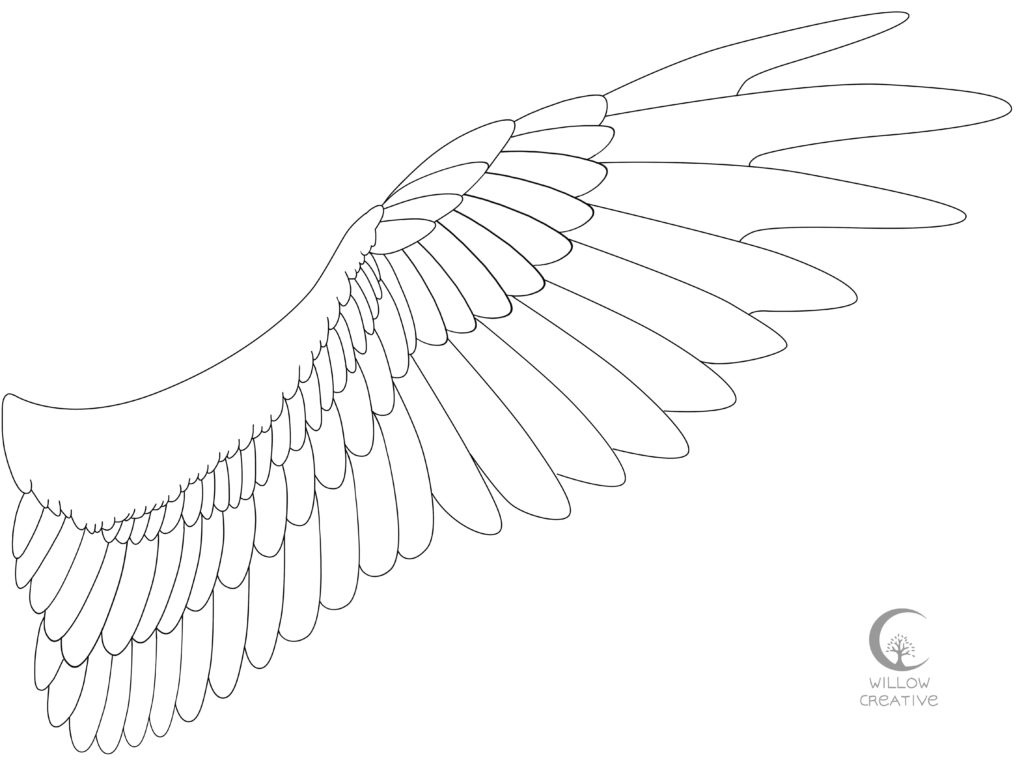
Feathered wings pattern can be found on my website as well. You can use this to determine the shape, size and position of the feathers.
FAQ
Q: Can I purchase a bare frame or finished pair of wings made for me?
A: No. Due to the risk of malfunction, breakdown, risk of injury and large size, I don’t sell any.
Q: Can I purchase those 3d printed joints or purchase the STL files?
A: The files are not available, this is a build log on how I did mine, not an exact tutorial for your own copy. You can drill aluminum or metal rods directly for joints, no need to use 3dprinted ones.
Q: How heavy are these kind of wings?
A: The frame weighs about 4 kilograms. A finished pair of skinned (demon style) wings weighs 5kgs. A pair of feathered wings weighs 7kgs. Of this weight, ~1.2kg is the motor.
Q: How large can you make them?
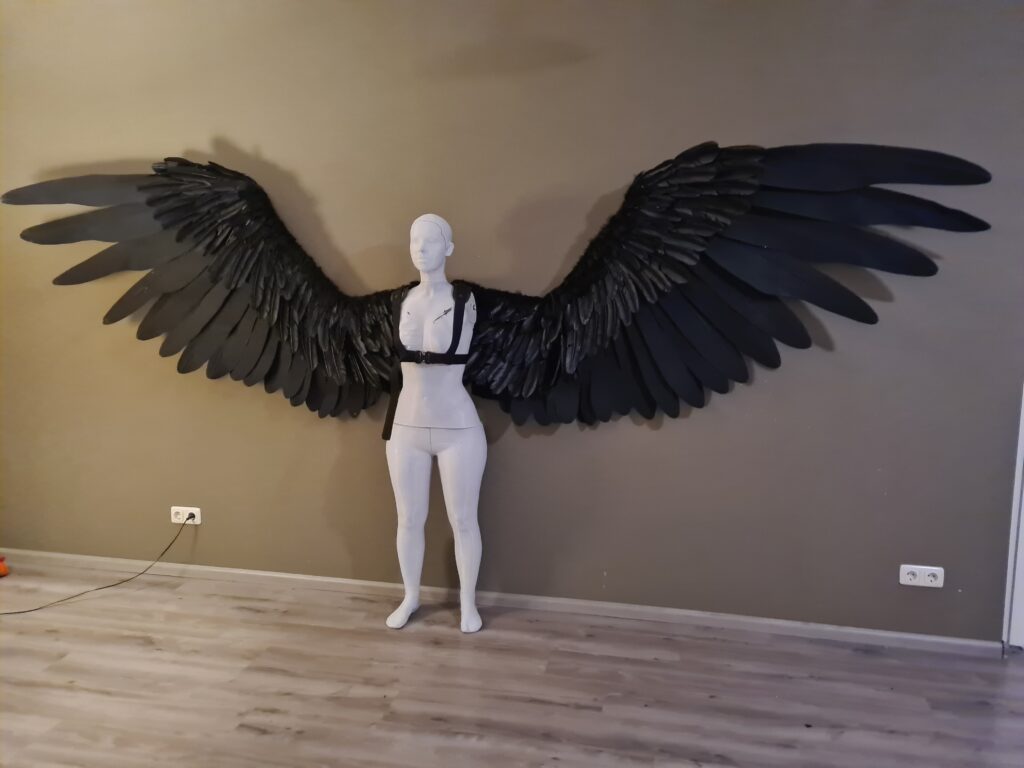
A: Due to the lever effect, the larger you make the wings, increasingly more strength is necessary to lift them up. I recommend not going beyond 5 meters total wingspan, or you need a larger motor or multiple motors which is also heavier and consumes a lot more power. The wings on this page are generally bit over 4 meter wingspan.